
Review · MOUNT FUJI TOURS
Hakone: Self Guided Trip to Mt. Fuji // Made by Local Guides
Hakone to Mt Fuji in one day sounds busy, but it’s smart. This self-guided plan strings together the classics with real-world help like a step-by-step PDF and food and transport recommendations. I like that it’s designed for independent travel, so you can move at your pace while still feeling supported. One thing to keep in mind: you’re on your own for logistics, and there’s a 45-minute walk/hiking section plus areas that may be tough if you have mobility or fitness limits.
The route is built around viewpoints and simple transitions, not complicated decision-making. You start in Shinjuku, then work through Moto Hakone, a stop at Amazake Chaya, a historic path section, Lake Ashi, Mt Fuji viewpoints with a boat cruise, and finally Owakudani for geothermal scenery and the famous black onsen eggs. My only caution is timing: some activities close early in Japan, and a day that’s too tight can feel rushed if you don’t plan your buffer.
If you want a low-cost way to do Hakone with less guesswork, this is a good fit.
Key Highlights Worth Your Attention
- A PDF itinerary you can follow on the go with where to go and how to get there.
- Food and transportation recommendations at key stops, not just a list of sights.
- Historic route flavor with the Old Tokaido Line section and stone-paved walking time.
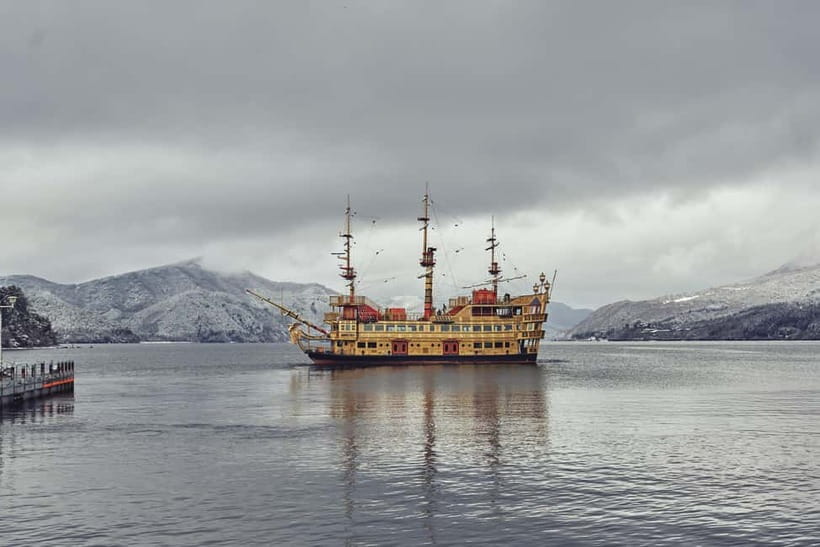
- Lake Ashi on a pirate-ship-style cruise for Mt Fuji framing and easy photo moments.
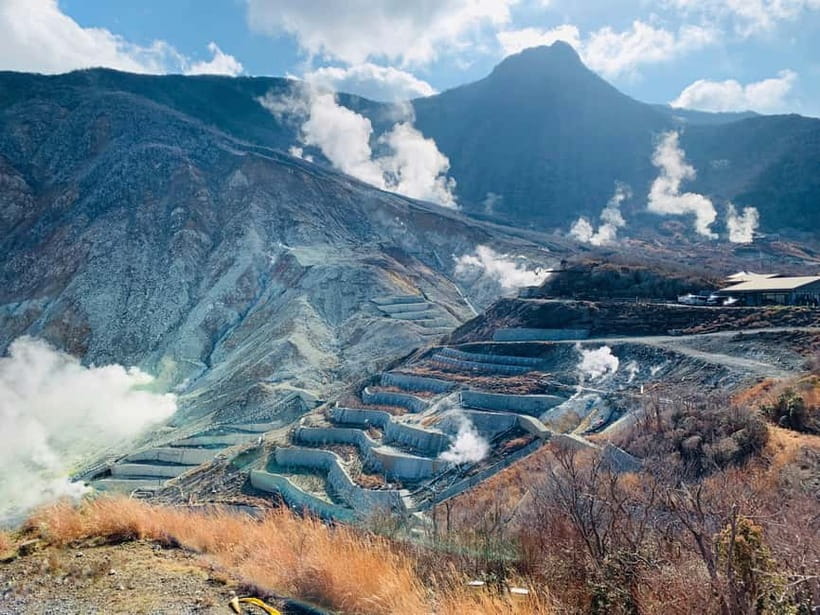
- Owakudani geothermal payoff including the black onsen eggs tradition.
- Support that answers questions if you get stuck, based on recent user comments.
Why Hakone and Mt Fuji in One Day Can Feel Actually Doable
Hakone is famous for two things: getting you close to Mt Fuji without a complicated itinerary, and offering lots of ways to get those postcard views. The clever part here is that the day is structured like a set of connected scenes. You get a small pocket for strolling (Moto Hakone), a stop for a warm local treat (Amazake Chaya), a scenic transit moment (Lake Ashi), and a destination finale (Owakudani).
The plan is also built for self-guiding. You’re not stuck waiting around for a group. If you want an extra minute at a viewpoint, you can usually take it. If you’re hungry, the PDF includes food suggestions so you’re not wandering until you finally find something.
The only mismatch risk is physical effort. There is a walk/hiking component of 45 minutes in the middle of the route, and the day is listed as not suitable for people with back problems, recent surgeries, respiratory issues, wheelchair use, or low fitness. If any of those apply, this might not be the right format for you.
You can also read our reviews of more guided tours in Tokyo

Price and Value: What $3.22 Really Buys You
The listed price is $3.22 per group up to 1. At that rate, you’re not paying for a ride, admissions, or a human guide. You’re paying for the planning tool and built-in recommendations.
Included value that matters on the ground:
- Full PDF with detailed instructions on where to go and how to get there.
- Food recommendations at different stops.
- Photo-stop guidance for scenic viewpoints.
- General travel tips for Japan.
- A $3 discount on an eSIM code included inside the PDF.
Not included, so you should budget separately:
- Transport costs and any entry tickets
- Food
- Hotel
- A personal guide walking you around
In practice, this is best seen as a day-trip “cheat sheet.” A couple of users noted the information can be done on your own, but the PDF still saves time and reduces friction. If you already know Japanese transit well, you might replicate it. If you don’t, the PDF can be the difference between a smooth day and a stressful one.
Your Day Starts with a PDF, Not a Meeting Room
After purchase, you receive an email with the PDF of your itinerary. They ask for 1 to 3 business days to send it, since there are many emails to handle. This is worth planning around. If you’re traveling soon, I’d only book if you have enough buffer to get the document before you leave.
On the day, the itinerary begins from Shinjuku City, with the practical instruction being: your first train is from Shinjuku station. The meeting point coordinates are provided as 35.6938253, 139.7033559, which can help if you’re mapping the start in an app.
How to use the PDF so it actually helps:
- Read it once at home, then skim it again the night before.
- Take photos of any key transit notes so you can find them fast.
- If the plan includes options, pick your “must-do” items first, then treat everything else as flexible.
One user specifically recommended that you check closing times for each activity so you can adjust your departure times. That’s a real-world Japan tip, and it fits the self-guided format perfectly. Build in buffer, especially if you want time for photos.
Shinjuku to Hakone: The First Hour That Sets the Tone
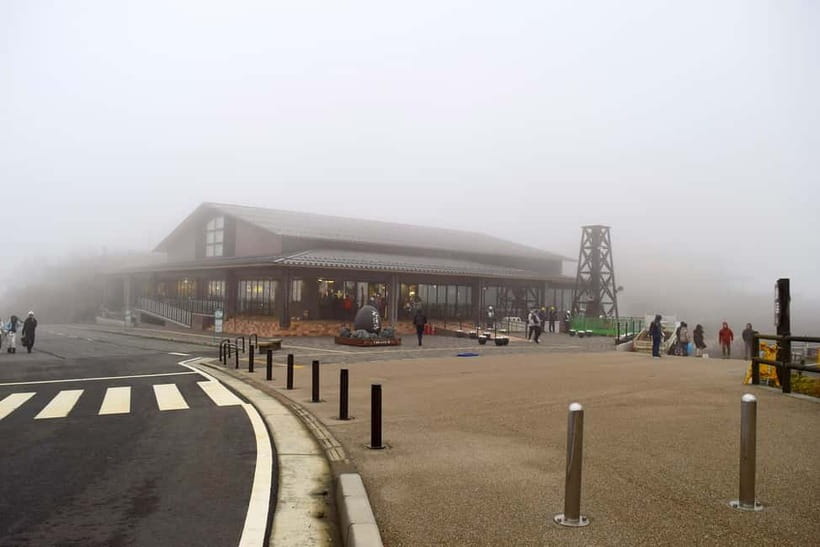
Your first big “scene change” is Hakone, with the plan moving you from Tokyo into the Hakone area. The first main stop is Hakone, with a 1-hour block that includes break time, visiting, lunch, and free time, plus local snacks and regional food.
This part matters because it’s where you decide your pace. If you start relaxed and snack early, the rest of the day feels less frantic. If you sprint through and skip food, later stops may feel like you’re constantly making up time.
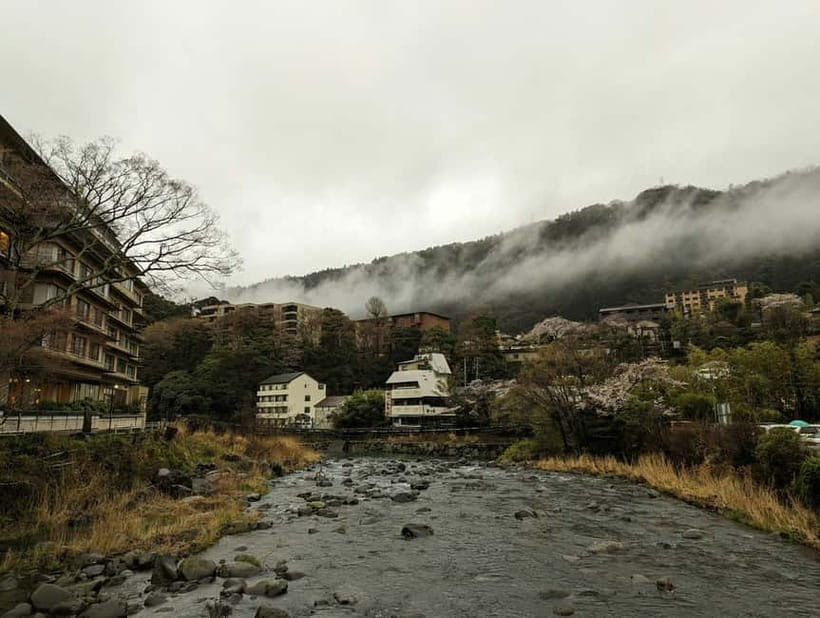
Moto Hakone is described as a quaint village with traditional shops and eateries. Even if you only have an hour, this is a good spot for:
- Quick browsing in traditional streets
- A calmer start before the more scenic segments
- Deciding where you want your meal timing later in the day
Practical caution: Hakone is not a place where you want to be “late everywhere.” The day includes multiple timed segments, so treat this hour as a launchpad, not a leisurely wander with no plan.
Amazake Chaya: Warm Treats and a Cozy Stop Mid-Route
Next comes Amasake Tea House for about 1 hour, focused on tea and traditional treats. This stop is small, but it’s a useful rhythm break. After transit and street walking, a warm drink stop keeps you energized.
The highlight here is amazake, a sweet rice wine-style drink served warm. They also mention savory snacks and a cozy, historic teahouse atmosphere.
Why I like this type of stop on a self-guided itinerary:
- It’s an easy win, you don’t need a reservation mentioned here
- You get something local that you might not seek out on your own
- It helps anchor the day so you feel like you’re doing Hakone, not just moving between view decks
Timing tip: if you’re the type who takes photos first and orders second, try to swap that order. You’ll eat while you still have energy, and you won’t feel rushed when you sit down.
More Tokyo tours and experiences for the shortlist



The Old Tokaido Line Stone-Paved Walk: Scenic, But It Demands Footing

After Amazake Chaya, the plan includes 旧街道石畳(バス), with 45 minutes for walk and hiking. This is tied to the Old Tokaido Line, a historic route between Tokyo and Kyoto, and you’ll be moving through a stone-paved or road-like section.
This is one of the most important sections to get right, because it is the only clearly labeled walking segment with a defined time. If your legs are fine and you’re comfortable on uneven surfaces, it’s a great way to add texture to the day. If you’re not confident on your footing, you’ll want to slow down and keep your expectations modest.
Who this part suits best:
- People comfortable walking uphill or on textured surfaces
- Travelers who like history-by-feeling, not just by reading plaques
- Anyone who wants a break from boats and viewpoints
Who should reconsider:
- Anyone falling under the itinerary’s listed “not suitable” categories (back problems, mobility issues, wheelchair users, respiratory issues, recent surgeries, low fitness)
Lake Ashi: The Pirate-Ship Cruise for Mt Fuji Framing
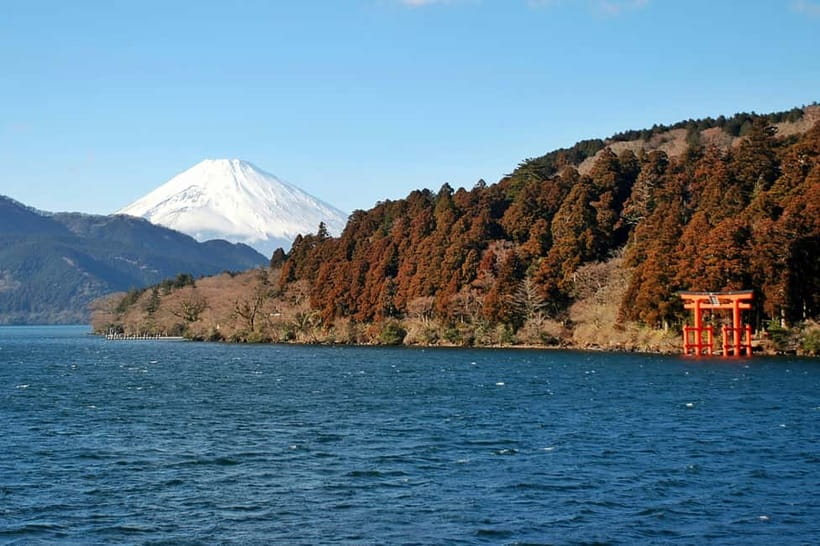
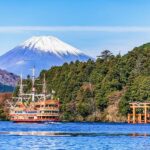
Then you hit Lake Ashi for 1 hour, with photo stops, a self-guided tour, and scenic views on the way. The big draw is the boat experience described as a majestic pirate ship cruise, with Mt Fuji towering in the distance.
Even without being told exactly how long the boat portion lasts, the plan makes it clear this is a signature photo moment. Lake Ashi is one of those places where the scenery does the work for you. Your job is mostly timing and viewpoint selection.
Photo strategy that makes sense here:
- Arrive ready with your camera settings if you’re shooting Mt Fuji, not just the boat
- Spend a little time scanning for clearer sight lines before you commit to one spot
- Treat the photo stop as a chance to breathe, not a frantic sprint
The self-guided framing also helps. You can hang back if you’re waiting for clouds to shift, or move forward for better angles. You’re not locked into one viewing spot with a group.
Mount Fuji Segment: Viewpoint Time Plus a Short Boat Component
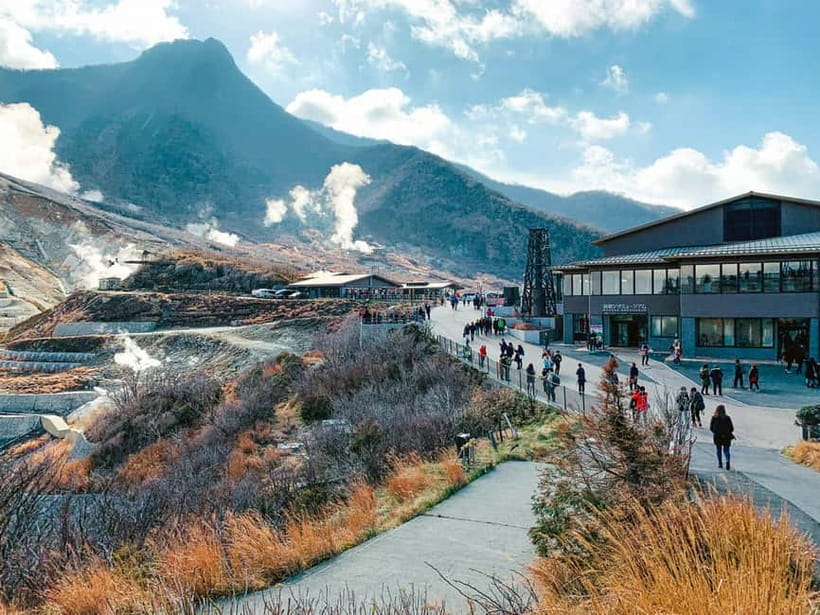
The itinerary includes a dedicated Mount Fuji block with a total of 30 minutes, featuring break time, a photo stop, sightseeing, and scenic views on the way, plus mention of a boat cruise.
This part is short by design. That’s often how you stay sane in Hakone. You’re not trying to “do” Mt Fuji like a museum. You’re catching views when conditions allow and then moving on to Owakudani.
What you should expect, practically:
- Mt Fuji views depend on weather and visibility. When it’s clear, you’ll feel like the day finally “clicks.”
- When it’s not clear, you’ll still have scenic moments, but you’ll need to accept that Mt Fuji might be partially obscured.
Since this is self-guided, your best move is to check your timing against the PDF and not assume the best view will last. If you get visibility, take it seriously for photos and enjoy it in real life too.
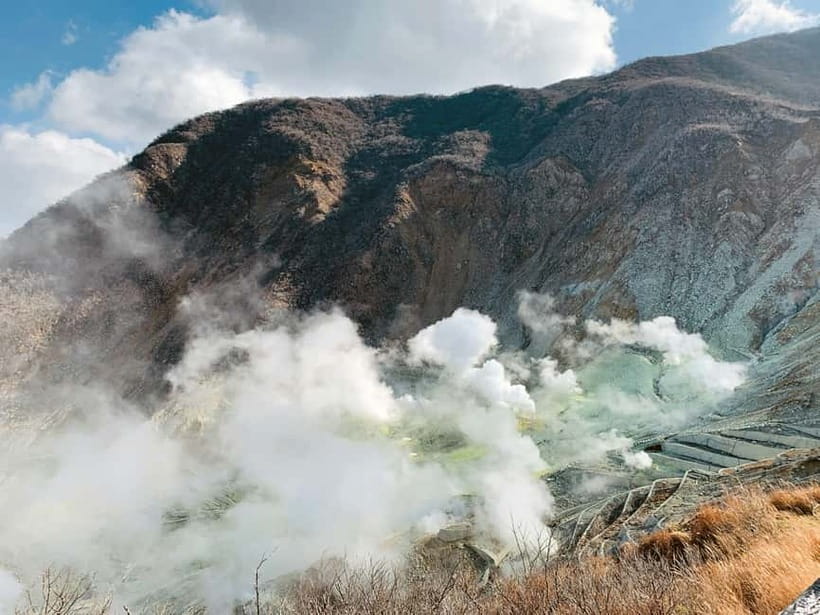
Owakudani in Hakone: Geothermal Drama and Black Onsen Eggs

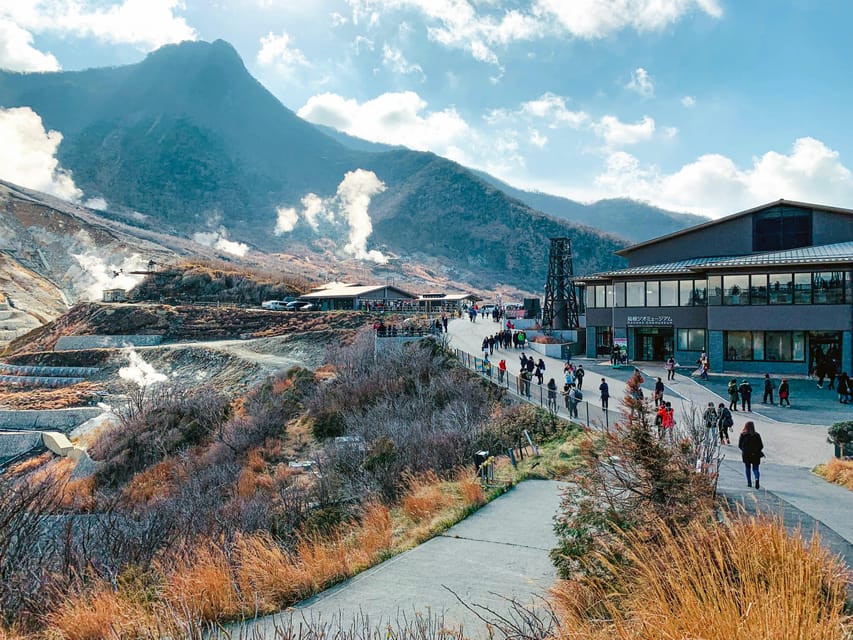
The final major stop is Owakudani, Hakone, for 1 hour, with photo stops, visiting, sightseeing, self-guided exploration, and scenic views on the way.
This is where the day ends on a high-impact note. Owakudani is described as stunning with natural beauty and culinary delights, including the famous black onsen eggs. The itinerary mentions the legend that each egg adds seven years to your life.
Even if you ignore the legend, this is a strong capstone because:
- It’s visually dramatic, not just a viewpoint.
- It pairs scenery with a snack you can actually remember and taste.
- It’s a memorable way to end a day focused on transit, water, and distant views.
Practical caution: geothermal areas can mean strong smells and hot or uneven zones around facilities. Wear footwear you trust and keep your movements careful, especially if you’ve already done the earlier walking section.
Food and Transport Notes: How the PDF Reduces Guesswork
One reason this experience is rated highly (it sits at 4.6 from 7 reviews) is the usefulness of the planning document. The highlights include food and transportation recommendations, and multiple comments echo that the PDF is clear and helpful.
Here’s how those recommendations help you:
- You get suggestions at each stop, so you aren’t making rushed decisions after you arrive.
- You avoid the common Japan trip problem of wandering without a plan, then paying more time and money to fix it.
- You’re given photo-stop prompts, so you’re less likely to miss the moments that give Hakone its “wow.”
A balancing note from one piece of feedback: the itinerary is easy to follow, but it can help to build in closure times for each activity since many places in Japan close earlier in the afternoon. So use the PDF as your backbone, then layer in real-time timing judgment.
Also included is a $3 eSIM discount via a code in the PDF. That can matter if you want reliable data for maps and transit lookup, especially if you’re using multiple stations and boat schedules.
The Real-World Timing and Pace: Why It Can Feel Smooth or Tight
This day is scheduled in blocks:
- Hakone area stop: 1 hour
- Amazake Tea House: 1 hour
- Old Tokaido stone-paved walk: 45 minutes
- Lake Ashi: 1 hour
- Mount Fuji views: 30 minutes
- Owakudani: 1 hour
- Then return to Shinjuku City
That totals a lot of movement within a single-day structure. The good news is each stop has a clear time window, which prevents you from overthinking. The downside is it can feel tight if you:
- Start later than planned
- Spend too much time at early viewpoints and run short on later ones
- Hit cloudy weather and take longer to wait for clear views
Your best tactic is simple: keep your schedule for travel segments firm, and give yourself permission to relax only during breaks and snack times.
Who This Self-Guided Mt Fuji Day Fits Best
This tour format is best for travelers who like structure but hate group rigidity. If you’re comfortable navigating trains and walking between points, the PDF becomes a real shortcut.
I think it works especially well if you:
- Want to explore at your own pace but still appreciate clear guidance
- Like photo stops and scenic transitions
- Are fine paying for transport and meals separately while you carry a planning document
It may not be the best match if you:
- Need step-free mobility or have mobility limitations
- Have respiratory issues or recent surgeries
- Are concerned about back problems
- Have low fitness, since the route includes a defined walking and hiking segment
What the Best Reviews Point Toward, Without the Hype
The highest rating comments emphasize two things: independence and clarity. People highlight that the itinerary is planned for you in a way that reduces stress, while still letting you go at your own pace.
There’s also an important support angle. One comment notes that they answer questions. For a self-guided day, that’s not just nice, it’s practical. If a train platform changes, or you’re unsure where the next segment starts, having someone you can ask can save your afternoon.
The most critical feedback boils down to this: you could probably do it yourself with public info, and it wasn’t worth the cost if you only wanted a basic plan. That’s a fair comparison, especially at a low price point. So I’d think of this as buying time and reducing guesswork, not buying expertise you could never replicate.
Should You Book This Self-Guided Hakone to Mt Fuji Day?
If you want Mt Fuji views with a clear plan and useful food suggestions, I’d lean yes. The big value is the PDF: it helps you move from Shinjuku to Moto Hakone to Amazake Chaya to the old route walk to Lake Ashi and onward to Owakudani without turning your day into a spreadsheet.
Book it if:
- You’re comfortable traveling independently
- You like photo stops and scenic sequencing
- You want a low-cost planning tool that also includes a small eSIM discount
Skip it if:
- You need an actual human guide to manage route changes and navigation
- You’re not comfortable with walking and hiking time
- You’re expecting transport and entry tickets to be included
If you do book, do one thing that will make the day feel easier: use the PDF as your baseline, then check closing times in your own planning mindset so you’re not rushing later. That small habit keeps the self-guided format fun instead of stressful.
More Self-Guided Tours in Tokyo
More Guided Tours in Tokyo


More Tour Reviews in Tokyo

Not for you? Here's more nearby things to do in Tokyo we have reviewed




Mount Fuji Tours, side by side.
 ★ 5.0Mt Fuji and Hakone 1-Day Bus Tour Return by Bullet TrainFrom $16326,383 reviews
 ★ 4.0Mt Fuji & Hakone Cruise, Drum Show Bullet Train 1 Day from TokyoFrom $1497,413 reviews
 ★ 4.4Tokyo Mt Fuji 5th St & Hakone Cruise Bus Tour w/Bullet TrainFrom $1545,024 reviews
 ★ 4.5From Tokyo: Mount Fuji Full-Day Sightseeing TripFrom $684,970 reviews
 ★ 4.7Mt. Fuji Tour, Hakone Ropeway, Owakudani, Lake AshiFrom $544,002 reviews
 ★ 4.2Mt. Fuji 5th Station & Hakone Cruise 1-Day Bus TourFrom $1292,381 reviews
 ★ 4.7Mt Fuji Top 5 Spots Day Tour: Arakurayama Park,Oshino HakkaiFrom $532,066 reviews
 ★ 5.0Private Tour to Mt. Fuji and Hakone (Fully Licenced Operator)From $4971,910 reviews
This tour also belongs to